intro

A random series of articles on war gaming in 40K, FOW and other systems. The headings are, WiP; Conversions and models in various states of assembly. PiP; Paint works on various models. Mission Critical; scenarios or missions to bring a bit of a twist to a normal game. MiA; rules for units and characters that could/should/might appear in a game. Dig In; How to guides on making various types of terrain for different game systems. Sit Rep; Battle reports and after action reports on games played

Thursday, January 26, 2012

Sitrep (40K) second day of the battle of Ratisbona


Day one had gone badly, Day two did not start off to great either when Max showed up carting a pair of Landraiders.

Round 4 Vs Max Haehnel
Deployment: Pitch battle
Primary mission: Breakthrough. Each squad in the enemy deployment zones worth a battle point. Whichever side has the most battle points is the winner
Secondary mission: Most valuable unit. The most expensive troop choice is automatically the most valuable unit. If this unit gets into the enemy deployment it counts as four battle points

The enemy: Black Templars
1 Grand Marshal
1 Emperor’s champion
1 Jet pack Chaplin
1 Predator
1 Jet pack squad
3 tactical squads
1 land speeder
2 land raiders
1 Terminator squad
1 Dreadnought in a pod

Max of Clan Haehnel made the trip with brother, nephew and son from Dusseldorf and reminded me of General Grouchy, if General Grouchy was less grouchy.

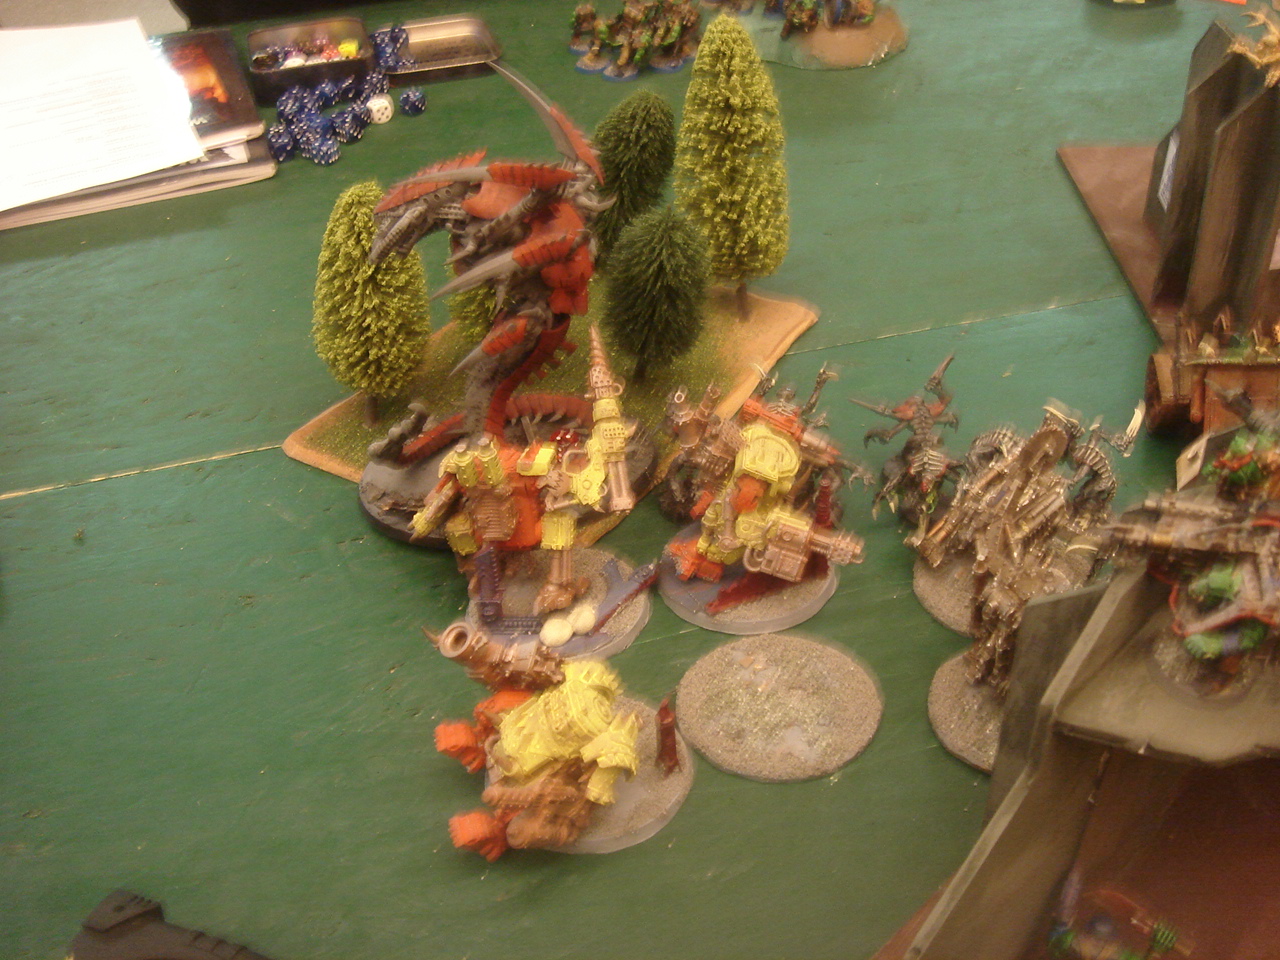
Not quite a MexiOrk village

Templar's with Landraider support

And more Landraider support

Max won the roll off an opted to go first. Most of the Black Templars went on one flank with the Marshal, Champion and Terminators in the middle in Land Raider. The sole predator occupied the refused flank.  In response the shoota boyz and a choppa mob lined up against the heavy flank while the kans and the other choppa mobs took the centre. Big meks reinforced both groups. While Lootas opted for high ground.  The orks failed to seize the initiative and Black Templar’s advanced. One lootas mob took fire and fled the battle.  The orks countered with both of the shoota mob moving towards the jet pack squad that had advanced to fire. The Orks opened fire at destroyed the jet pack squad. Typically, it took nearly every gun the army to destroy the squad while the kans sprinted forward.  Deranged by the loss of his squad the Chaplin assaulted at thirty boy mob and provided them with free consolidation move.  

Last charge of the chaplin

The Dreadnought arrived but scattered battle of target. Elsewhere, the marines tried without success to whittled down the Kan wall.  While the Marshal ans hid retinue dismounted to assault the kans.  The Orks started to surge forward one mob assaulted the dreadnought pinning him in combat. Lootas got a shot of the land speeder and sent it crashing to the ground.  The Marshal retinue and the Kans exchange blows a few terminators fell for a few damaged dreads.  
The Marines continued to try and stem the tide but there were too many orks, two tactical squads were swallowed by the mobs while the drop pod and a Landraider was taken apart by the Kans.   The Marshal retinue final finished of a the Kan mob it was fighting only to be swallowed by another Kan mob backed up by a Choppa mob.  In the end the Marines were reduced to a Landraider and a Predator that had been backed into a corner.
Result; Win Orks 17-3

Round 5 Vs Hannes Niedermeiser
Deployment: Spearhead
Primary mission: Seize ground. With three objective, one centre of table (worth two points) and one in each of the empty table quarter (worth one point)
Secondary mission: Seize the high ground. The highest point on the battlefield counts as an objective.

The enemy:
Swarm lord with two Brood Guards
Doom in a pod
2 broods of Hive Guard
2 Tervigons
5 Genestealer broods

The Doom seemed to be doing the rounds in Ratisbona. So unfortunately, were the Genestealers. The Bugs won the roll off and predictably picked the quarter with the highest point on the battle field.  The Orks deployed the Shootas on the flanks with Kans up front. Lootas were deployed at the back surrounded by Choppa boyz. The bugs then deployed all of the Genestealers on one flank.  

Orks line up for a fight

Stunningly, the Orks stole the initiative the Kans wheeled about to engage the Genestealers while the Choppa boyz started to push forward. Shooting savaged two broods of Genestealers and destroyed a brood of Hive Guard.  Stunned, the Tervigon spawned a brood of gaunt and then was empty. The Genestealers scuttled through cover towards the Orks while the remaining Brood Guard destroyed a Kan.   The Orks coniuted to pour fire into the Genestealer and savaged another brood as well as claiming a Tervigon kill.  

Lurking Genestealers

The badly depleted Genestealer swarm hit the Kan wall and stopped.  The Doom made an appearance but was denied good drop zone and had to deploy badly.  The Orks surged forwards two Choppa mobs broke the Genestealer swarm, while another finished of the Doom and its Pod.  

The Doom makes an appearance

With the line broken the Bugs tried to consolidate on what they had. Another Tervigon was destroyed by shooting and the Swarm Lord and his retinue were pinned in combat with the Choppa Boyz.  In the last minutes of the game the surviving bugs broke cover and rush to contest most of the objectives. The game ended abruptly before the Orks could wipe out the remaining half a dozen bugs.

Result  Draw 

Conclusion
Overall, Ratisbona was good funny. Two losses, two draws and one put the boyz in the middle of the pack.  I would have loved to have swapped tables with my opponents in games one and two. The hi light was probably against Max’s Black Templar’s. His English was as good as my German so we generally had to mime whatever orders were given the armies.  
The secondary mission added spice to the event. But I think the order in which they were declared could be changed. For example write down the scert lovers before deployment and declare it after deployment otherwise it is to easy just to pick the enemy unit in front of all your guns to be the target.

More pictures of the battle for Ratisbona can be found here  

Sunday, January 22, 2012

Sitrep (40k) Battle of Ratisbona 2012


Ratisbona is, I think, the closes Germany has to a GT. It is also the last date to make the cut for the German ETC team on merit alone. Making it a pretty tough field. Of the 100 places available at one stage they had 140 sign ups. On the day there was 98 players.

Round 1 Vs Roland Zaglauer
Deployment: Pitch battle
Primary mission: Seize Ground
Secondary mission: Assassination, enemy's most expensive HQ counts as an objective marker for the player if he is killed and you control his body at the end of the game.
Special rules: 1st round night fight, Infiltration, Outflank, Reserves, Scout

The enemy: Seize ground
The Baron
3 Haemonculuci
3 True Born Squads with blasters in venom
5 Wrack squads in Venoms
3 Ravagers
2 large beast packs
1 large Hellion squad

Dark Eldar line up

Roland brought a chess clock to the game to time rounds, which was a first for me.  Playing Venom heavy dark was not the best match-up for the Boyz. To make it worse the table consisted of impassable terrain and three small areas of terrain. Roland won the roll off and opted to deploy first. Leaving the Orks with only a small bush to hide behind.
The opening volley from the Dark Eldar was pretty heavy with Boyz and Kans dropping along the line. The Ork return fire was non existent due night fighting and flickers fields in the end only a single Venom was stunned.

Wild Boyz beat of beast pack

The second round of Dark Eldar fire was decisive. The Big Mek's kustom force field must have been overload since none of the Kans and very few Boyz passed a cover save.  The Orks tried to push forward aimed at destroying Dark Eldar scoring units and reducing the fire from the Venoms.  The Baron and his pack pounced on the screening Ork mob and quickly destroyed. Elsewhere a Beast pack tried to do the same but was badly beaten and fled.  Running out of Boyz the Orks opted to consolidate what they had. A mob got the drop on the Baron but were destroyed with little effort.
With the writing on the wall the Orks shot up a couple of Dark Elder scoring units. But it was not enough.

The Baron swoops on an Ork mob

Game result: loss Orks 17-3
I am not sold on the chess clock for 40K.  It works out both players get one hour and fifteen minutes play in the end I lasted fifthy five minutes Vs the Dark Eldar's hour and a half. It was possible to play down the clock in the Dark Eldar's turn with wound allocation and combats but what would be the point?.

Round 2 Vs Patrick Kampmann
Deployment: Dawn of Battle
Primary mission: Annihilation
Secondary mission: none
Special rules: Infiltrate, outflank, Reserve, Scout

The enemy:
1 Mawloc
2 Tervigon
Doom Of Malathani in a pod
2 broods of Hive guard
2 large packs of Genestealers
1 large pack of Homuguants
1 pack of gaunts
.
This time the table had plenty of cover, The boyz would have preferred less to allow for more shots at the bugs.  The Boyz won the roll off and opted to deploy first to deny the side with the most cover from the Bugs. Shoota boyz and Big Mek to deny the table to infiltrators with the rest of the army opting to roll on. In reply the bugs opted to all roll on turn one except the Doom who opted to pod in.

March of the Bugs

Turn one saw the Boyz consolidate their position with the lootas looking for the high ground.  The Bugs arrived and advanced behind a screen of gaunts in cover.  The Boyz open fire, destroying a hive guard unit, downing some genestealers and whittling down the skirmish line.  In response the Bugs pushed down one flank.  The Boyz continued to whittle down the Bugs while the Kans moved forward to engage them.  

Turn three saw the arrival of the Doom who podded straight into the Ork lines and started to mind drain Orks.  The Orks replied by assaulting him and beating him up pretty badly but he stayed standing. Else where an Ork shoota mob opted to assault destroy the Bug screen to take it out of play.  The bugs pushed forward using terrain to make up for the loss of the skirmish screen.  The Shoota mob was destroyed by Homugaunts and genestealers with depressing ease.  The Boyz beat up the Doom again but again he survived.

Doom of Malathani pods in

With the Bugs closing, the Kans moved in for the pin. But disaster struck with all three Kan mobs failing to make contact, leaving the Boyz open for Bugs assault.  Next turn saw the arrival of the Mawloc and the Bugs hit, destroying three mobs in combat. Freeing up the Doom in the process.  The badly damaged Bug mobs opted to hide out of sight of the remaining Orks. While the Orks in returned tried to repair their battle line.  The Kans again failed to make contact with the rampaging genestealers. In reply, one Kan mob was destroyed by the  Mawloc .  The Orks open fire whittling down squads but not getting any kill points.  The Mawloc ate another Kan mob. With that the game ended.

Mawloc eating kans

Result: Ork loss 17-3

Round 3 Vs Thomas Goeritz
Deployment: Spear Head
Primary mission:Capture and control
Secondary mission: Secret lovers? Nominate one unit in your army if it survives the game you count as scoring an objective. Also nominate one unit in your opponents army if it is destroyed you count as scoring an extra objective 
Special rules: Infiltrate, Out flank, Reserves, Scouts

The enemy:
1 Libarian
3 Purifier Squads, two with razorbacks
3 pysker retinue
1 Arco-Flagellant retinue in chimera
1 Assassin retinue
1 Melta gun retinue
2 Dread Kinghts
1 Dakka dread.

Thomas is a Dresdener and we had played before. The last time he had a fate weaver and bloodcrusher bomb. Unfortunately, it met the Sisters just after they had solved the Kairos Conundrum. Thomas is also an awesome painter/convertor and once ran his own sculpting line.

Orks line up for Grey knight attack

The Grey Knights won the roll and opted to deploy first. Their objective went into a forest while the boyz one went behind a hill. Dreadknights deployed in the flanks while purifiers went in the centre with the retinues behind them. The boyz deployed the shoota mobs behind some kans covered by a Big Mek. While the lootas opted for the high ground. 

Dread Knight advances

The Serect lovers had to be declared after deployment. Predictably both side picked units in the front line for their opponent secret lover, kans for the Knights and a squad of Purifiers for the Orks. While their own unit was hidden at the back of the army, Melta gun retinue for the Knights and a Big Mek for the Orks.. Turn one saw the Grey Knight destroyed the valuable Kans while the Dread Knights opted to move around the flanks. The remaining Grey knights moved into cover near the Librarian who prepared to cast Shroud to boost the cover save of near by units.  
In reply one mob of Orks assaulted a nearby Dread Knight, while the lootas destroyed the valuable purifier unit.  The rest of the boyz started shooting at transported with little effect.
 The Grey knights began to advance with pykser retinues laying down covering fire to whittle down the boyz. A purifier squad assault the mob attacking the Dreadknight and between it was quickly destroyed.  The remaining orks got no reinforcements this turn the lootas destroyed to of the knights transports while the boyz whittled down the purifiers.
The Knights continued to advance trying to threaten ork objective and the valuable Big Mek. Final the orks got some reinforcement in the form of two slugga mobs and a kan mob.  The kans targeted the Knights valuable meltagun retinue which was also conveniently guard the Knight own objective and destroyed it. A choppa mob attacked and destroyed a Dread Knight while another pinned the other Dread Knight in combat. The Lootas finished of another Purifier squad.   

Killa Kans over watch Grey Knight objective

The loss of two objective in one turn triggered a change in the Grey Knights battle plan. All of the Pykser retinues pulled back and raced to reclaim their objectives while the rest of the force tried to push on to the Orks objective. The Grey Knight dread raced to intercept the killa kans that covered the now empty Grey Knight objective. The purifiers backed up with the Liberian again decimated the orks with the surviving squad killing sixteen boyz in a single round of shooting.

Grey Knights advance

The Boyz grudging gave ground ineffectively firing at the grey knights while the lootas proved to be out of range of the pykser retinue. The last turn saw one of the retinue just make it into claim range of the grey knights objective. Final score was 3-2 on objectives

Results: Draw 12-8 to Orks

Tuesday, January 17, 2012

Mission Critical (FOW); Agmes 1944


Somewhere in France 1944

Introduction
The Allies have broken the Brocage and are racing through France.  German High Command has order the bridge over the river Meuse be blown and the 503rd tank recovery depot be redeployed. However, as the Greman prepare to withdraw British armour sighted.

Design notes:
This was originally based on battles games magazine issues 26 and the german crossing of the Meuse in the early war. However, I picked up an elephant tank destroyer and a JR ruined tank factory and was itching for an excuse to use them.

Terrain
The river is impassable except at the bridge (open terrain) and the ford (very difficult terrain)
Hill  103 is impassable to vehicles and very difficult terrain for infantry to move on to, except by the path. The hill top itself open terrain.
The woods are difficult terrain for vehicles and open terrain for infantry.
The village of Beacon and the repair camp is concealing terrain.


The Forces

Germans (Defending,. Confident Veterans, approx 1680)
At Agnes
Grenadiers company HQ with attached Panziershreiks and mortar section
1 grenadiers platoon with panzerfaust and three sections
1 grenadier pioneer platoon with panzerfaust and two section
1 Machine gun platoon with one section
1 grenadier anti aircraft gun platoon with 1 section

At Hill 103
1 grenadiers platoon with panzerfaust, 2 sections and one attached HMG
1 grenadier anti aircraft gun section (out of command section from the grenadier anti aircraft gun platoon at Agnes)
1 Luftwaffe anti-air assualt platoon with two section

At the repair camp
1 grenadiers section with attached HMG (out of command section from the grenadier platoon at Hill 103)
1 panzer platoon with 3 PiV (emergency tank repairs)
1 Tank hunter platoon with 1 Elephant (emergency tank repairs)
1 grenadier anti aircraft gun section  (out of command section from the grenadier anti aircraft gun platoon at Agnes)

At the bridge
1 grenadier pioneer section (out of command section from the pioneer platoon at Agnes)

In delayed reserve
1 Panzier platoon with 4 PIII

British (Attacking, Confident Trained approx 2080)
Tank Company HQ with 4 shermans
3 armoured platoons with 3 shermans
1 recce platoon with three Stuarts
1 Anti tank platoon with 2 section on M10s with 17pdrs
Infantry company HQ
3 rifle platoons each with three rifle squads
1 gun troop with four guns (off table with the observer on table)
Priority Air support (typhoon)

Special Rules;
Not ready
The Germans are in the process of preparing to withdraw and are not ready for a fight as a result all german units begin the game pinned.

Emergency tank repairs
The tanks in the repair camp need to be fixed before they can enter the game. At the start of the German tunr roll a D6 for each tank. On a 6 the tank becomes available and can move as normal. For the panzer platoon the first tank to become available becomes the command tank.

Deployment and who goes first
The Germans deploy at their starting locations. Andcan opt to dig in before the game
The British drive on from the western table edge.
The German delayed reserves come from either the southern or northen road. Roll a D6 when they arrive 1-3= South. 4-6 = North.

The British get the first turn

Game length:  The game last for twelve turns or until one side breaks contact.

victory conditions:
There are three objectives in this mission, Hill 103, the village of Agnes and the repair camp. All the objectives start under German control. By the end of the game who ever has the most objectives is the winner.

After action report;
For the game the british opted to attack by night. In hindsight it was more a hindrance than a help. grounding air support, slowing down the tanks and allowing the Germans time to unpin.

Table set-up

hill 103

Garrision at Brecon

 Tank repair station

 88's on overwatch

 British advance under cover

 Tanks roll out to duel with the 88's

Lots of tanks.

88's claim frist kill

followed by two more

 View from hill 103

Elephant was repaired but then destroy by allied air support on the way to the front (sounds familiar)

Later a PiV was also hit on the same road.

By day break the allies finally finished the 88's and rolled across the bridge

panzer 423 never managed to repair itself for the entire game

Newlz arrived PIIIs opted to out flank through the forest and hit the allies crossing the bridge in the flank

And succeeded in blocking the bridge with wrecks

Remaining allied tanks see of the PIIIs ad race to the tank repair station but the game times out with the german controlling all the objectives


Monday, January 9, 2012

PiP (FOW) The British are coming


Five days to the German version of the 40K GT. So why am I painting FOW British infantry? Not sure, but they look good.

The entire army went from blisters to finished over the two weeks.


Basing method
This was the first time I have done the base as part of the model before priming. Normally I do it afterwards using wood filler which dries to an earth color and saves me having to paint the base..

The models were assembled and cleaned as normal then glued to the base.
Wood filler was used to add texture to the base.
To customise the bases Cork Bark* was broken up to form large boulder.
These were added to the bases then modelling sand was added in patches.
The base was then coated with water down PVA glue to seal the materials

Painting method
P.= Plasicote sptray. P3.= privatter press, V= Vallejo, GW= Games workshop paint

Once dried the models were sprayed with P. primer grey
The bases were painted P3. battledress green.
The models were base coated V. English uniform.
The helmets and mortars were painted V. Russian Green.
The rifles and other wooden bits were painted V. German camo brown.
The boots were painted GW chaos black.
The gaiters, belts and backpacks were painted V. German camo beige
The guns and other metals bits were painted V. gun metal.
The  helmets was stippled PP. bloodtracker brown.
The hands and faces were painted V. Flat flesh.
The whole model was given a V. smoke wash.
Then the base were dry brushed V. midstone.

* Battlescapes sells cork bark rubble for 5 euro for a small bag. But bottle of wine with a cork costs 3-4 euro. You can break up the cork and use it for the bases. You get less cork but more wine so it is an okay trade off.

Company command plus snipers

2iC

Heavz mortars line up


HMG platoon


1st platoon

1st platoon command

1st platoon 1st squad


2nd platoon command

2nd platoon 1st squad


3rd platoon moves out