intro

A random series of articles on war gaming in 40K, FOW and other systems. The headings are, WiP; Conversions and models in various states of assembly. PiP; Paint works on various models. Mission Critical; scenarios or missions to bring a bit of a twist to a normal game. MiA; rules for units and characters that could/should/might appear in a game. Dig In; How to guides on making various types of terrain for different game systems. Sit Rep; Battle reports and after action reports on games played

Friday, September 24, 2010

FOW; mission critical-Blastov

Somewhere on the Eastern Front in 1944.
Design note; adapted to FOW from CS grants table top teasers in battle games issue 23


Introduction; 
After a long absence Kampgruppe O'Donnell has been sent into battle once more. Its orders are to advance down the Blastov road to stop any potential Russian advances. After a night of heavy rain the lead platoon reports sighting Russian tanks blocking the road.

Blastov Road

The Protagonists
Kampgruppe O'Donnell
1 Company HQ (2 PV)
1st platoon (5 PIV)
2nd platoon (3 PV)
Heavy tank platoon (3 PVI)
Tank hunter platoon (4 jagdpanzer)

Panzer IV's move into Blastov village
And spread out to engage the approaching Russians.


The Russians
Battalion HQ (1 T34/85)
1st Tankovy company (10 T34/85)
2nd Tankovy company (10 Shermans)
Panzer IV's claim the frist kill with a long range shot on a sherman.
Return fire destory a PIV.
3rd Light Tankovy company (10 Stuarts)
1st Guards heavy tankovy company (3 IS-2)
2nd Guards heavy tankovy company (3 IS-2)
1st Guards heavy assault gun platoon (5 ISU-122)


Panthers and Tigers rush to the rescue
Deployment;
See map.
The German 1st platoon starts at A
2nd platoon and the heavy tank platoon start a B
The German Tank hunter platoon starts the game in reserve
The Russian start deployed at point 1.

Special rules
Its been raining
During the night before the battle the area was affected by heavy rain the result is that several unmapped marsh areas have formed on the battlefield. Before deployment each player must secretly roll D6-2 to see how many marshes they have. During the game at the start of your opponents movement phase a player can reveal one or more of their marsh markers by placing them down on the table. Marshes cannot be placed in terrain or on the road but they can be placed under an opponent’s units.
While Russian units wait for re-supply.

And there is a lot of Russians.

Pushing hard
The Russian force has been pushing hard to get into position as a result several platoons are low on fuel and need re-supply. After deployment secretly roll a D6 for each Russian tank company and consult the chart below.
4-6 no effect the unit can fight as normal
3- The unit is in the process of being resupplied and cannot move or shoot for the frist turn
2- The unit is in the process of being resupplied and cannot move or shoot for the second turn.
1-The unit is in the process of being resupplied and cannot move or shoot for the third turn.


Resupplied the Russians push the right flank taking casualties in the process.
And the Left flank as well.

Victory conditions;
This is a plain and simple shoot-out the game last until one side breaks or is destroyed.

But take heavy losses in the process.

Sunday, September 19, 2010

40K; Sitrep, corridor combat

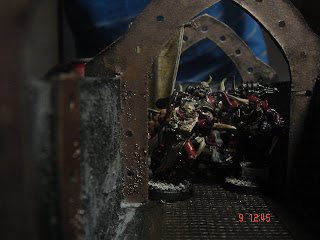
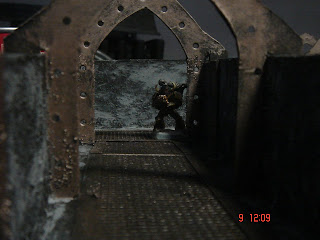
“Do you want a 1000 point game next week?” And “can you bring your camera and the rules for 40K space hulk” seems too interesting a game to pass. It turns out Franco gone and built himself a 6’x4’ space hulk and wants to christen it in gaming. Below are some of the in game pics

Word Bearers breach the compound.

This is the view of the frist room they encounter.

Before moving into the next corridor.

Solar Wolves react as the alarm is raised.

Solar Wolf breaks cover to take a pot shot.

Dark Disciple leads from the front.

While the Solar Wolf captain stalks the corridors.

Word Bearer reinforcements pour in.

Only to be met with stiff opposition.

Solar Wolves and Word Bearers clash in close combat.

Thursday, September 16, 2010

Wip (40K); Battle Buggies take 2

Jeez, when the Ork codex came out I thought the war buggies were one of the weaker units, now I cannot get enough of the gits. Below is my second war buggy squadron.

Materials

Deff koptas

Plastics rods

Wheels

Gubbins


Method.

  • The skids, rotors were cut off the Deff koptas.

  • Plastic rod was measured and then cut to fit in the front and back of the Deff koptas.
  • Large wheels were attached to the rear axle while small wheels were attached to the front axle.
  • To raise the front a length of plastic rod was measured and cut to raise the front wheels of the kopta
  • The rear and front axles were then attached to the koptas.
  • To tide up the back a jet turbine (alternative any gubbins could do) was added and the gap was filled in with green stuff.

Wednesday, September 8, 2010

PIP (40K); Boom, painting Ork big guns with hairspray


Painting the gunners

The gunners were prepped (flash removed, etc).

The gunners were undercoated AP desert yellow.

Their flesh was painted goblin green.

Their tunics and clothes were painted random selections of GW bestial brown, snakebite leather, codex grey and ultramarine blue.

Teeth, nails, toes etc were painted GW bleached bone.

Their metal tools were painted a random selection V gun metal and GW tin blitz.

Their bases were painted codex grey and based with urban scatter material.


Painting the guns

The guns were undercoated AP rat fur

Once dried, the guns were sprayed with hairspray and coarse sand was sprinkled on to the guns.

The guns were then given a fine spray of AP metal.

Once dried the sand was scrubbed off using an old stiff brush. The result is metal effect which is stippled with rusty red spot, which look cool.

The guns cabling was painted GW blood red or GW ultramarine blue.

Handles were painted GW bestial brown.

Some of the armour plates on the gun-shield were painted with watered down V red or GW ultramarine blue. The watered down painted allows the rusting metal to show through while at the same giving a different colour to the gun shield creating a ram shackled effect.

legend

V= Vallejo

GW= Games workshop

AP =army painter

Wednesday, September 1, 2010

Dig in (40k) vehicle explodes marker

Materials needed;

MDF

Vehicles accessories or left over parts

Textured paint


Method;

Cut the MDF into the desired shape for the vehicle explodes marker.


The marker does not have to be the exact same shape as the vehicle it is replacing imagine bits of it have been blown off or away from the wreck.

Bevel (slope) the edges of the MDF

Take the vehicle components and glue them to the MDF either with liquid nails or PVA glue.


Once the first layer of vehicle components has set glue a second layer down the more layers the richer the effect.


Once all the layers have glued paint textured paint on any exposed parts of MDF and in patches over the vehicle parts.


Once the textured paint has dried undercoat the marker GW chaos black and paint the rubble to what theme seems appropriate. I like painting mine salamander green because one of my regular opponents uses a salamander army and the wrecks seem appropriate.


To save time I made a mould of my first template and just cast several more explodes marker ( hmm I wonder do the boys in Battle Cry are interested in a joint venture).